หวังว่าบทความนี้คงจะมีประโยชน์ไม่มากก็น้อย สำหรับผู้ที่ต้องการออกแบบ Network ภายในองค์กรของตัวเอง
| HOME | BOOK STORE | FREE LAB | MEMBER | CONTACT US |

You Can If You Think You Can > " โจดอยทำได้คุณก็ต้องทำได้ " นายเกรียงศักดิ์ นามโคตร (อาจารย์ดอย) ผู้ก่อตั้ง บริษัทโจดอย ไอทีแอนด์เซอร์วิส จำกัด ปัจจุบันดำรงตำแหน่งกรรมการผู้จัดการบริษัทโจดอย ไอทีแอนด์เซอร์วิส จำกัดและเป็นวิทยากรบรรยายพิเศษให้กับหน่วยงานทั้งภาครัฐและเอกชน Certifications : -------------------------------------------------------------------- Basic Network Command by Mr.Jodoi มาเรียนรู้การใช้ Network Command เบื้องต้นกันนะครับ ขอแนะนำ command ping และ command traceroute จากวีดีโอที่อาจารย์เกรียงศักดิ์ นามโคตร (อาจารย์ดอย) ทำไว้ใน youtube ครับ
มาเรียนรู้การคำนวณ IP Address version 4 ด้วยเทคนิคการใช้ตารางมหัศจรรย์ซึ่งทำให้ศิษย์นำไปใช้ในการทำงานและการสอบ Cert.IT ได้อย่างดีเยี่ยม
Basic Linux Command ตอนที่ 1 (ls,cat,vi)by Jodoi มาเรียนรู้การใช้ Linux Command เบื้องต้นกันครับ เริ่มต้นด้วย command ls , cat และ vi ซึ่งปัจจุบันมีความจำเป็นต้องเรียนรู่อย่างยิ่งเพราะหลายๆองค์กรมีการใช้ Linux Server กันมากขึ้น
และยังมีวีดีโอดีๆอีกมากมายรับชมได้ใน แชลแนล Mr.Jodoi ตามด้านล่างนะครับ https://www.youtube.com/user/MrJodoi
|
CCNA Tutorials และ Practice Lab |
|||||||||||||||||||||||||||||||||||
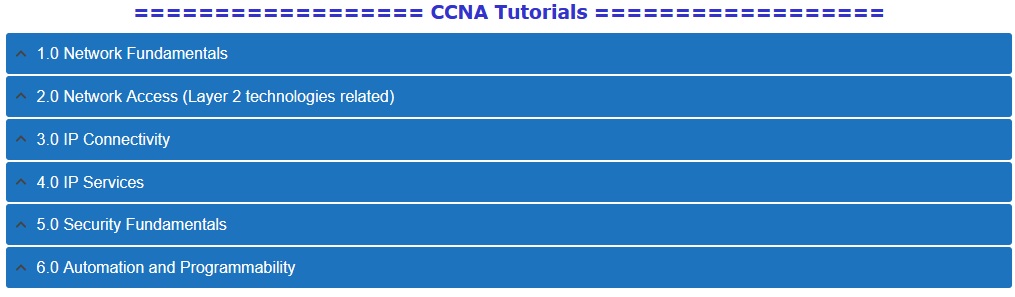
บทความนี้สำหรับศิษย์ที่ต้องการฝึกฝนการทำ Lab CISCO สำหรับการนำไปใช้จริงและเตรียมตัวสอบ Cert.CCNA นะครับ ปัจจุบัน CCNA จะแบ่งหัวข้อเป็นตามรูปด้านล่าง ข้อสอบจะมีทั้งแบบตัวเลือก จับคู่และ Lab Config ครับ
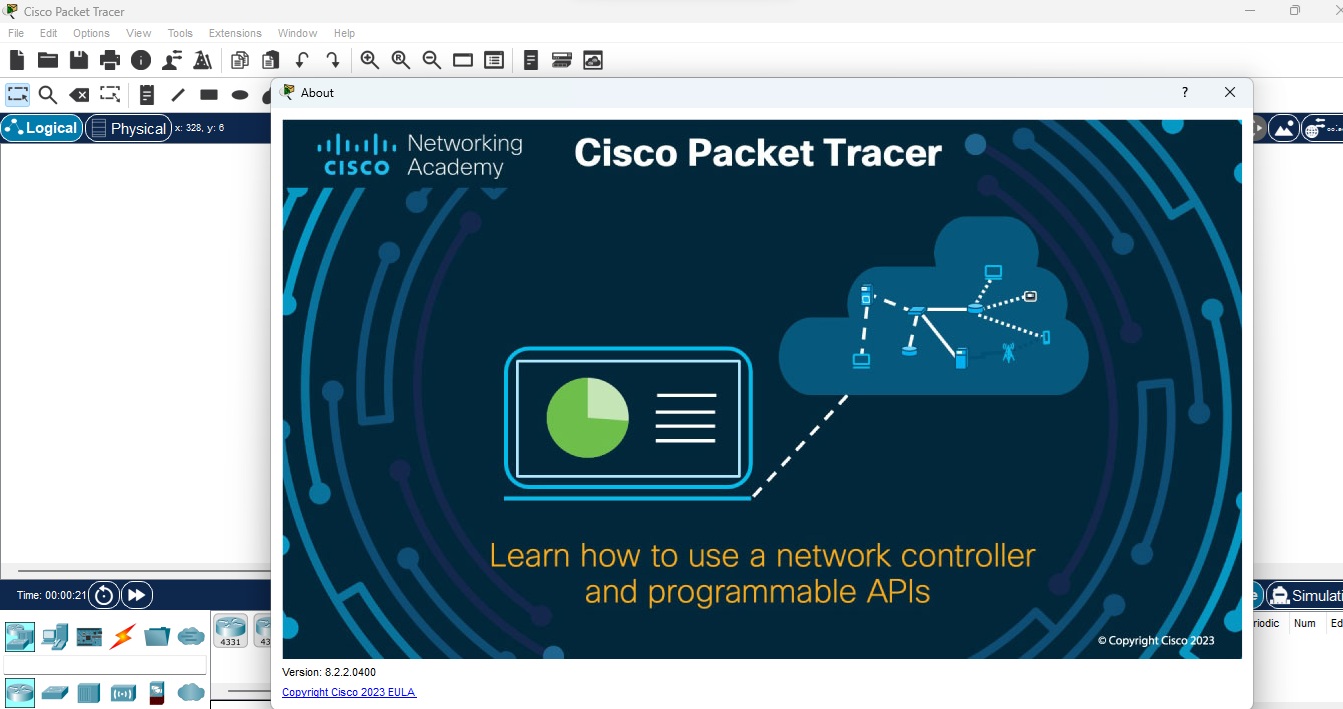
บทความนี้จะเน้นเฉพาะในส่วนของข้อสอบ Lab Config เพื่อให้ศิษย์ได้ฝึกฝนเท่านั้น เริ่มต้นด้วยการติดตั้ง CISCO Packet Tracer ก่อน สำหรับศิษย์ที่ไม่มีสามารถ Download ได้ที่ https://www.jodoi.org/download/Packet_Tracer822_64bit_setup_signed.zip สำหรับผู้ที่ไม่มี Username และ Password ของ CISCO ให้ทำการ Disable Internet ก่อนนะครับ และเปิด CISCO Packet Tracer ตามภาพด้านล่าง
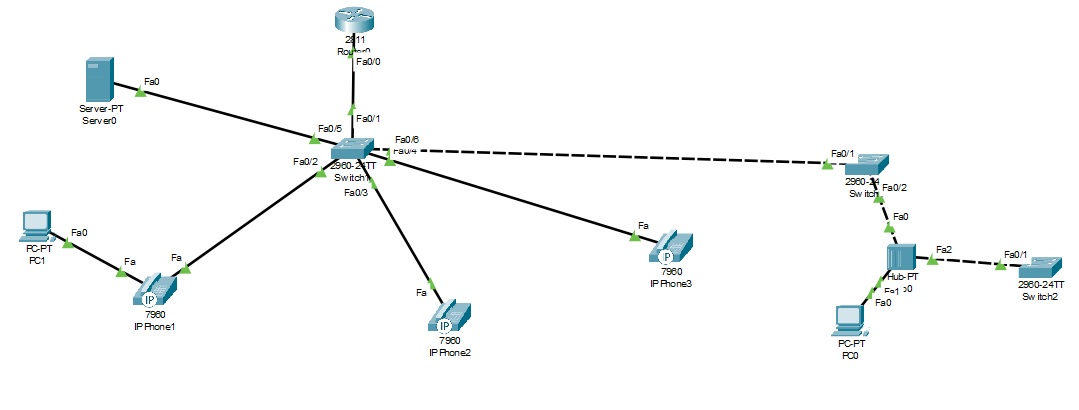
1).Lab Voice VLAN และ CDP ให้ Download File Voice_vlan_cdp.pkt ตามรูปภาพด้านล่าง
1) Configure VLAN 12 named Compute and VLAN 34 named Telephony where required for each task. SW1(config)#vlan 12 SW2(config)#vlan 12 2) Configure Ethernet0/1 on SW2 to use the existing VLAN named Available. SW2#show vlan brief VLAN Name Status Ports SW2(config)#vlan 20 SW2#show vlan brief VLAN Name Status Ports 3)Configure the connection between the switches using access ports. SW1(config)#interface f0/6 SW2(config)#interface f0/1 4) Configure Ethernet0/1 on SW1 using data and voice VLANs. SW1(config)#interface f0/2 5) Configure Ethernet0/1 on SW2 so that the Cisco proprietary neighbor discovery protocol is turned off for the designated interface only. SW2#show cdp neighbors SW2(config)#interface f0/2 SW2#show cdp neighbors ดูแนวทางได้จากวีดีโอด้านล่างครับ
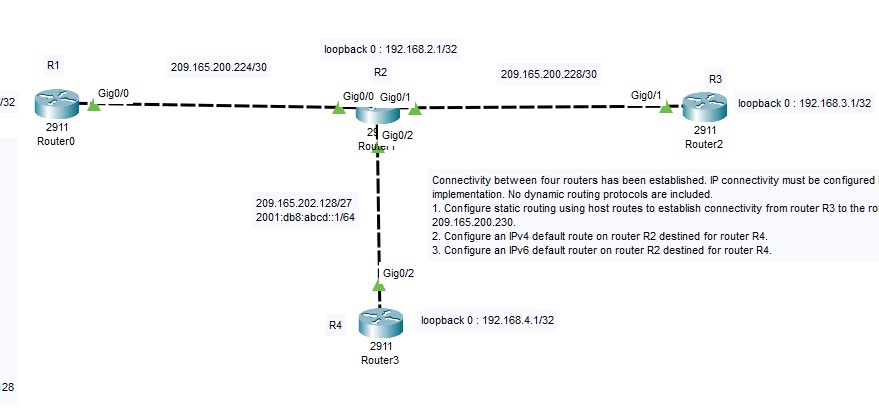
ให้ทำการ Download File Jodoi_Exam_Static.pkt จะได้ตามรูปภาพ
1. Configure static routing using host routes to establish connectivity from router R3 to the router R1 Loopback address using the source IP of 209.165.200.230. 2. Configure an IPv4 default route on router R2 destined for router R4. ดูแนวทางได้จากวีดีโอด้านล่างครับ
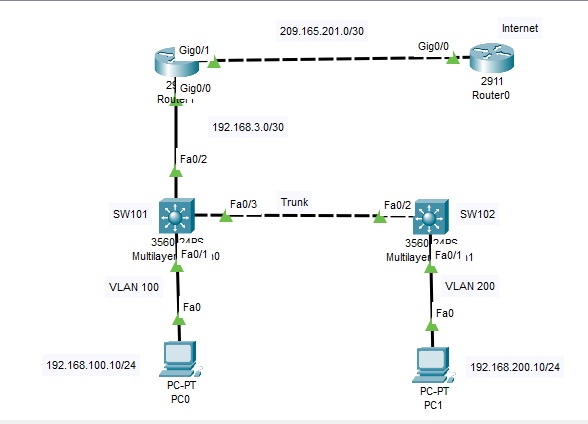
3) Lab Switch Security ให้ทำการ Download File Jodoi_Exam_Switch_Security.pkt จะได้ตามรูปภาพ
Task 1 Task 2 Task 3 ดูแนวทางได้จากวีดีโอด้านล่างครับ
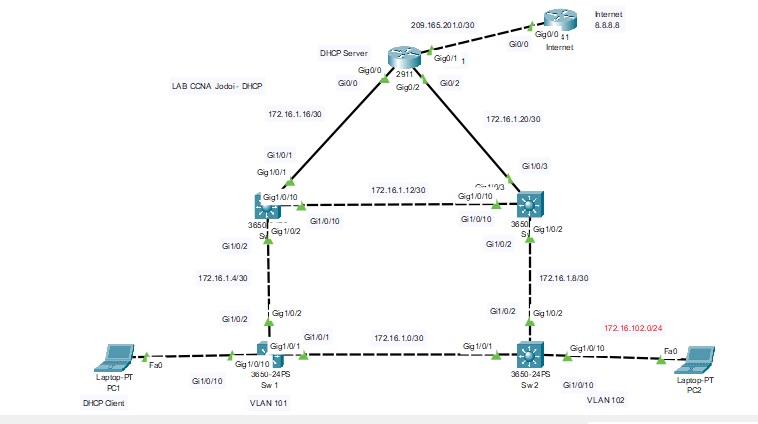
4) Lab DHCP ให้ทำการ Download File Configure_DHCP_Exam_Jodoi.pkt จะได้ตามรูปภาพ
และยังมีอีกหลายวีดีโอแนะนำสำหรับการเตรียมตัวสอบ Lab CCNA ครับ ดูได้ที่ Playlist นี้ครับ https://www.youtube.com/watch?v=0r0vbm23EVY&list=PLxTcKTJPFY7OCkvp4oSdcSt_1-aHH_zfF ขอบคุณครับ
-------------------------------------------------------------------------------------------------------- บทความ Network บทความ Linux บทความ Certificate
|